blindsprings:shoomlah:itscarororo:americanninjax:rtilrtil:Late last year I wanted to start
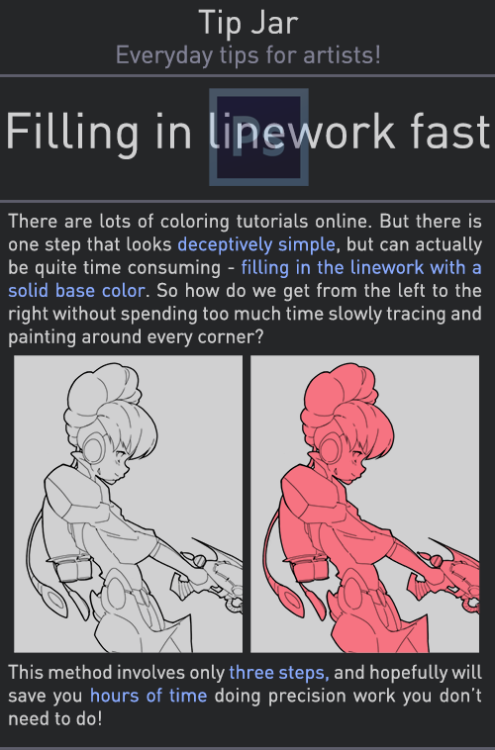
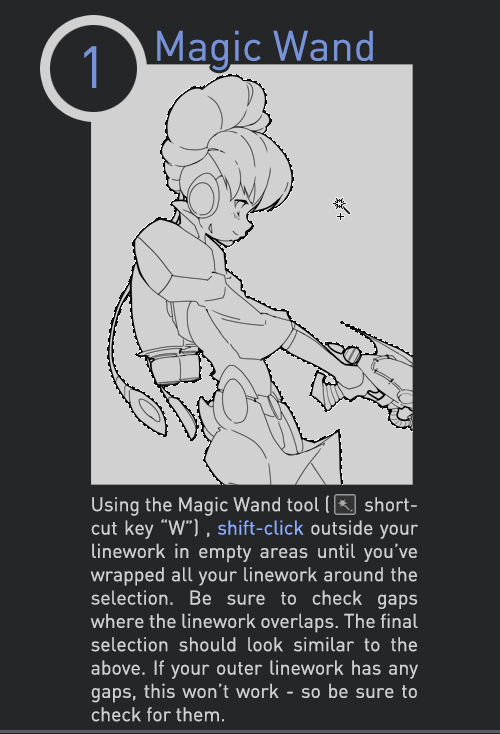
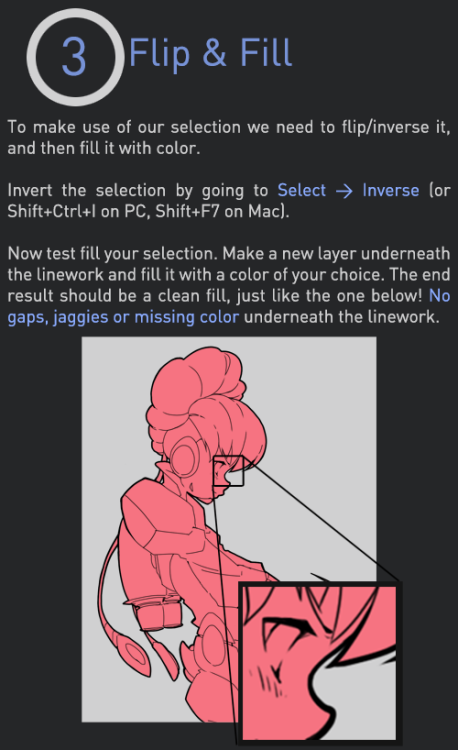
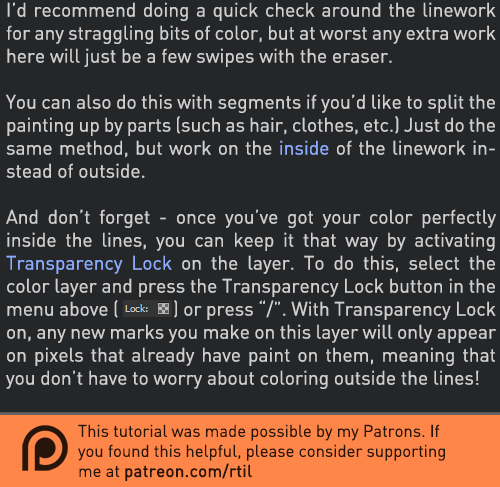
blindsprings: shoomlah: itscarororo: americanninjax: rtilrtil: Late last year I wanted to start a series of short tutorials called Tip Jar, as a way of saying thanks to my fans and giving back to my patrons. This is the first of the series I have made, showing my technique on quickly filling in lineart so you can get to painting without coloring outside the lines faster. Someday I hope to turn these into video tutorials when I have the income and the time, but for now I hope that I will be able to share useful tips in this infographic format. Full tutorial image Support me on Patreon This is exactly how I do my flats. This is how I do my flats! Really quick and easy! Worth sharing because this is exaaaaactly how I do my flats! I get this question all the time when I post my process videos, and this explains it far more succinctly than I ever could. :) This is also how I do my flats but unfortunately with lines that are see through (or sketchier) you get a lot of jaggies all over the place. So I play with channels! So alternatively step 1.5 is to click on the channels tab, and create a new layer. Fill the areas that you magic wand(ed) with black (leaving the characters/whatever you want to fill white). Click out of the marquee and use gaussian blur (i use 3.0 on a huge image, sometimes you need to go down for a smaller image) Then you go to image/adjustments/levels and put in–and this is where I sound like a mad scientist–88 1.42 and 122. Which cleans up the edges so they’re pretty clean! Then all you do is click on the circle at the bottom of the channels area (”load channel as selected) and then go back in to layers and click on a layer to load your original view again! and then do the rest of the steps. It will cause you to clean up corners a lot but it saves me a whole heck of time since i have a rougher inking style. This step takes all of 3 minutes at most but otherwise I’d have to base everything by hand :I Or spend a good 40 minutes cleaning up jaggies. TL;DR alternative step if you have rougher/sketchier lines. Oh! Since my lines often don’t join correctly, I create a layer underneath and fill any holes before i do selection (with “select all layers” ticked off) which is admittedly tedious but again. Way quicker than doing it by hand! So yeah if you see this and are like oh gee whiz this doesn’t work with how I do stuff, try this added step? (this is also how to do a stroke around an image that is cleaner than what you get from the layer styles box– I adapted these steps originally from a DA tutorial on how to get clean strokes!) -- source link
#tutorial#digital coloring
