elsiathewitch:HOW TO MAKE YOUR OWN PENDULUMI don’t particularly like crystals or find them meaningfu
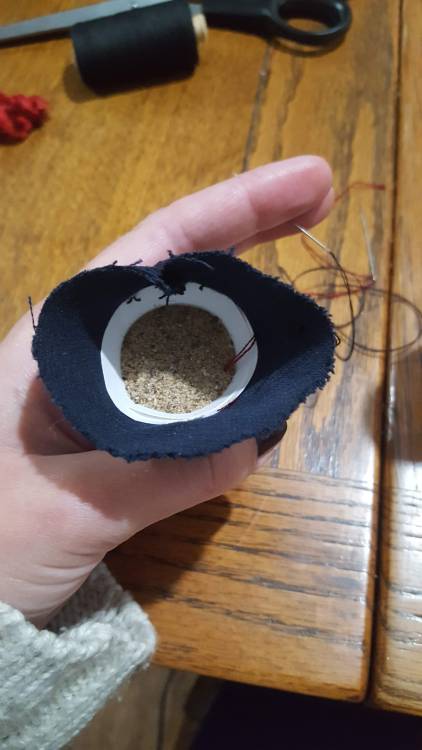
elsiathewitch:HOW TO MAKE YOUR OWN PENDULUMI don’t particularly like crystals or find them meaningful, and embroidery is something I use a lot of in my practice so I thought ‘How can I make my own pendulum?!’I’m super proud of this and wanted to share in case there are any more stitchy witches out there ;)Make your template. Start with a circle, then cut a line just to the centre. Spiral it in until you get a cone roughly the shape and size you want your pendulum to be, then mark where that is and cut away the excess. As I was also going to be embroidering a rhyme twisting around the whole thing, I roughly sketched onto the pattern to get an idea of where it would cross over.Trace your pattern onto a fairly sturdy fabric and get embroidering! I used a spare piece of stretch corduroy from some trousers I cut up, but I wouldn’t recommend using a stretch fabric. Something with a tight enough weave that the sand won’t leak out, sturdy enough to hold its shape, but flexible enough to create such a small, pointy object. Canvas would be perfect, or denim.Once it’s all embroidered, cut it out leaving seam allowance and a lot of excess fabric at the top to gather. Sew using the teeniest stitches you can along the straight edge and up the excess top fabric. I used a back stitch and did a double layer of stitches because I really didn’t want it to leak!Turn it all inside out, using something sharp to really poke out the pointy end, and then fill with sand/earth/grain/anything that’s dry and won’t rot. You can also chuck some dried herbs in there, or your own hair, or nail clippings, or crystals… use your imagination! I had to also put a thick paper cone in there to reinforce the shape, as the stretchy fabric I’d used made it all look a bit lumpy! Fill it right up to the top, trying not to leave any gaps.Tie a knot in your cord and bury it in the middle of your cone. Sew a small running stitch around the top roughly at where the fabric will meet in the middle and pull it tight to gather the fabric in. Use a nice strong thread so you can really gather it, then start to add more stitches through the centre of your cord to really secure it. Keep adding stitches into the top until you’re sure that the filling won’t leak and that the cord is secure. Trim off the excess then, if you like, wrap a decorative thread around it to neaten up and hide your stitches.At this point I also finished off my embroidery, finishing the words that crossed over the seam and adding a red spiral to help make the sentence more legible.Enjoy this thing you’ve just made! I love to make my witch tools myself and I love to use embroidery to connect with my female ancestors. -- source link


